A user who is integrating Apache Nifi and IBM FHIR Server asked how they get the SSL to work between the two, and here is a small recipe for you:
- List Keys
keytool -list -keystore \
  fhir-server-dist/wlp/usr/servers/fhir-server/resources/security/fhirKeyStore.p12 \
  -storepass change-password -rfc
Check to see if you have a default, if you do, go to step 2, else step 3.
- Change default
keytool -changealias -keystore \
  fhir-server-dist/wlp/usr/servers/fhir-server/resources/security/fhirKeyStore.p12 \
   -storepass change-password -alias default -destalias old_default
You can always double check with step 3.
- Create a new default with a distinguished name for your hostname (mine is host.docker.internal)
keytool -genkey -keyalg RSA -alias default -keystore \
fhir-server-dist/wlp/usr/servers/fhir-server/resources/security/fhirKeyStore.p12 \
  -storepass change-password -validity 2000 -keysize 2048 -dname cn=host.docker.internal
- Confirm the lists of keys
keytool -list -keystore \
  fhir-server-dist/wlp/usr/servers/fhir-server/resources/security/fhirKeyStore.p12 \
  -storepass change-password
Keystore type: PKCS12
Keystore provider: SUN

Your keystore contains 2 entries

old_default, May 15, 2020, PrivateKeyEntry,
Certificate fingerprint (SHA-256): 9D:94:C2:F8:C1:51:9B:0F:21:50:4F:BB:60:A4:8A:3F:AF:C0:F0:13:C4:80:BE:A3:94:42:04:46:56:DB:D9:7B
default, May 15, 2020, PrivateKeyEntry,
Certificate fingerprint (SHA-256): 5B:38:D5:FD:7F:8A:80:60:12:CF:7F:61:C6:D6:C5:54:F3:FD:F8:80:34:58:A5:3F:1C:8F:2C:0A:42:85:C0:49
Notice, the new key.
-
Restart your app server to pick up the latest. Once restarted, proceed to next step.
-
Confirm you see the subject is the one you need.
curl -k https://localhost:9443 -v 2>&1 | grep -i subject
*  subject: CN=host.docker.internal
- Start a nifi image
docker run -p 8080:8080 --rm apache/nifi:latest bash
- Find the docker container id
$ docker ps
CONTAINER ID        IMAGE                COMMAND                  CREATED             STATUS              PORTS                                                   NAMES
09d2a7395fa2        apache/nifi:latest   "../scripts/start.sh…"   7 seconds ago       Up 6 seconds        8000/tcp, 8443/tcp, 10000/tcp, 0.0.0.0:8080->8080/tcp   gracious_rosalind
- Copy the fhirKeystore.p12 (in this case we just updated this one only).
docker cp fhir-server-dist/wlp/usr/servers/fhir-server/resources/security/fhirKeyStore.p12 \
  09d2a7395fa2:/fhirKeyStore.p12
-
Login to Nifi – http://localhost:8080/nifi/?processGroupId=root&componentIds=1aef81c1-0172-1000-16cd-37702389d8d3
-
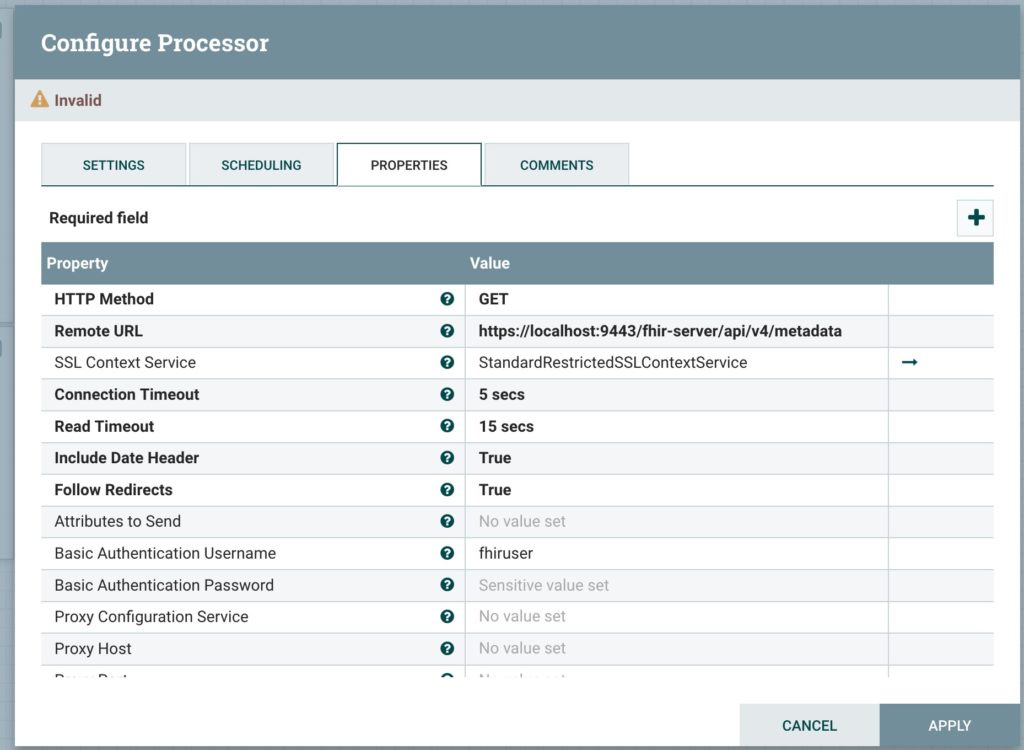
Add an InvokeHTTP
- Click Configure
- Click on properties
- Enter Remote URL –
https://host.docker.internal:9443/fhir-server/api/v4/metadata - Enter Basic Authentication Username – fhiruser
- Enter Basic Authentication Password – change-password
- Click SSL Context Service
- Click the Drop Down
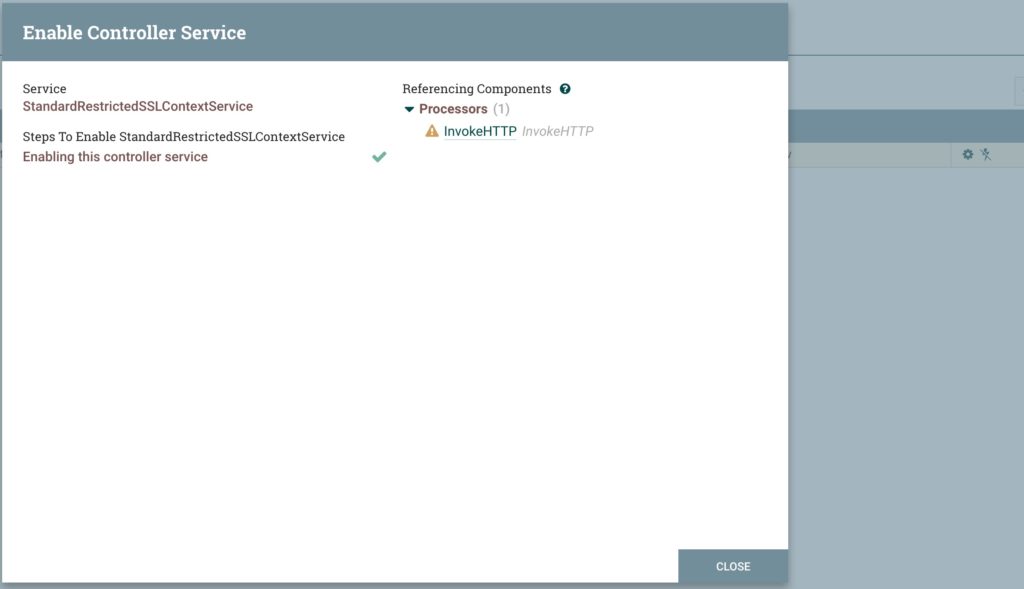
- Click Create Service – StandardRestrictedSSLContextService
- Click Create
- Click the Arrow to configure
- When prompted "Save changes before going to this Controller Service?", click Yes.
- Click Configure
- Click Properties
- Click Truststore Filename, and enter
/fhirKeyStore.p12 - Click Truststore Passowrd, and enter
change-password - Click Truststore Type, and enter
PKCS12
- Click Truststore Filename, and enter
- Click Apply
- Check the State –
Validating, you may have to refresh, until it says disabled. - On the left, click enabled, and turn it on, and click enable. It may take a minute
- It’s basically set up, now let’s get some output.
-
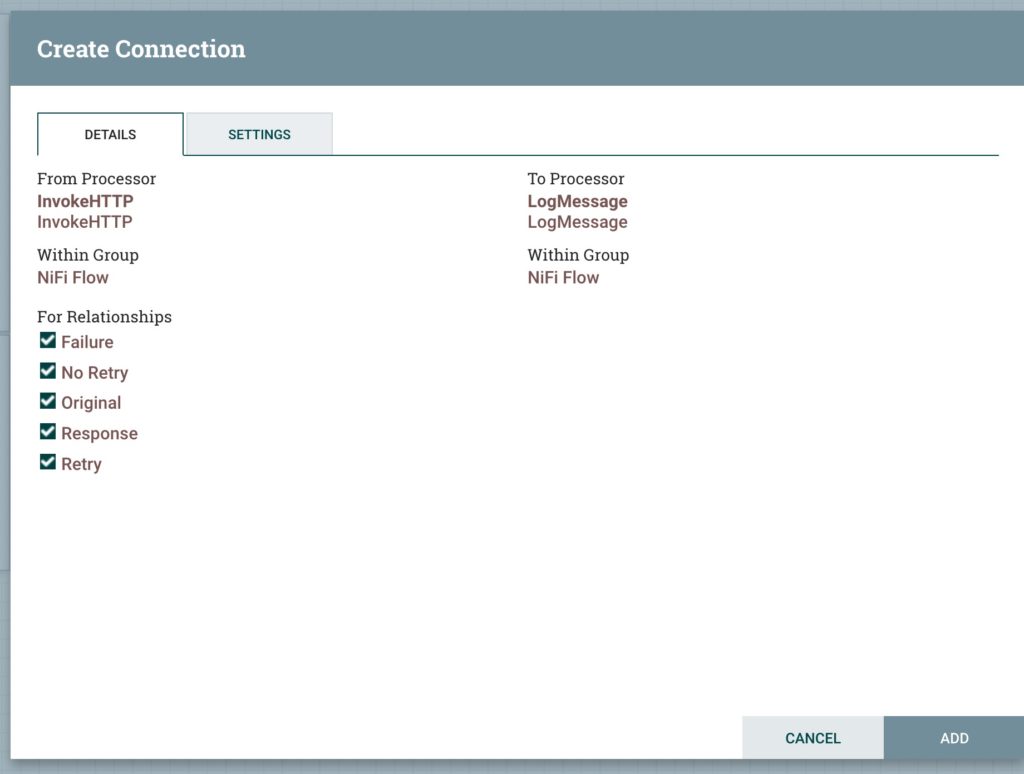
Add an LogMessage
- Select all Types
-
Link the Two Nodes
-
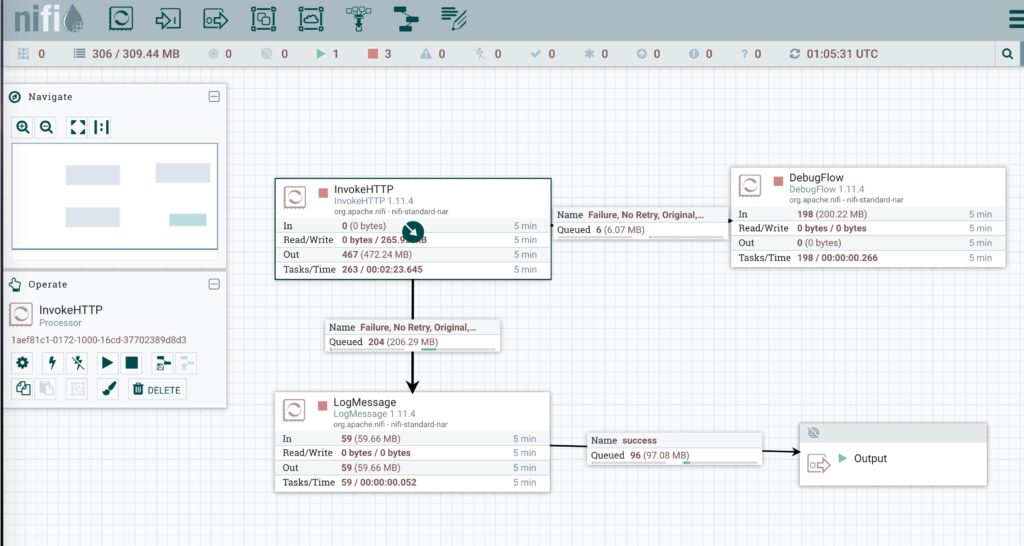
Click Play
You’ll see your Nifi flow working.
You can always use the docker image for the IBM FHIR Server https://hub.docker.com/r/ibmcom/ibm-fhir-server


Leave a Reply